Fushia
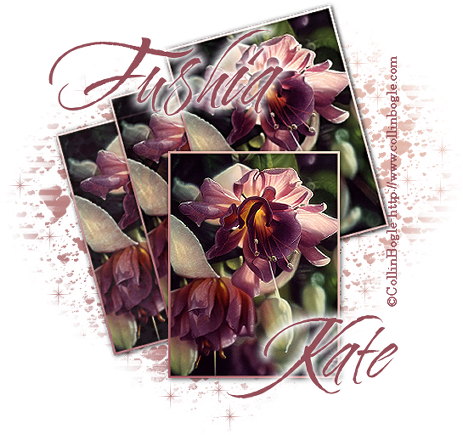
Image of choice.
Font of choice
Mask 170-from Weescotlass - HERE
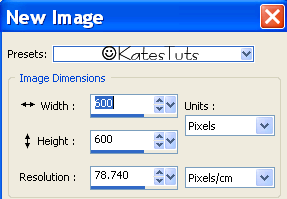
New canvas-600x600-white
Choose two colors from your graphic
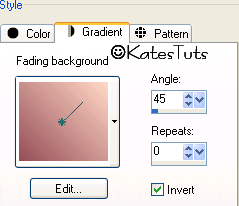
Make a gradient with
these settings, Linear, Angle 45, Repeats 0.
New Raster Layer - Flood Fill with your gradient
Mask layer - load WS Mask 170 - invert mask unticked
When you have your mask loaded - merge group
Resize your igraphic to about 225 x 300, add a 3 white pixel border.
Magic Wand, click the white border - fill with your gradient. Select none
Copy & Paste your igraphic onto your white canvas - go to your canvas
Image - Free Roatate - 15 left. Now duplicate your graphic 2 times for a total of three images.
Arrange these graphics like above.
When you have your images in place - cross out bottom layer & your mask layer,
merge visable your images. Unhide you 2 bottom layer. Give your merged images a drop shadow
of - 1/1/80/8.50-black

Copy & Paste your original grapic as a new layer - give it the same drop shadow as before.
Add youy name (you can give your name a gradient glow if you wish) & artists copyright. Cross out bottom layer (white) - merge remaining layers
visable - crop down - copy & Paste as a New Image - resize if need & save as a *Png image
This tutorial was written by ©Kate on 25th February 2009.
Any resemblance to any other tutorial is purely coincidental.
You may Link to this tutorial, and/or print for your personal use only.
Please do not copy, rewrite, translate, place it (or Zip files)
anywhere on the web, send via email, or claim it as your own.


Comments
Post a Comment