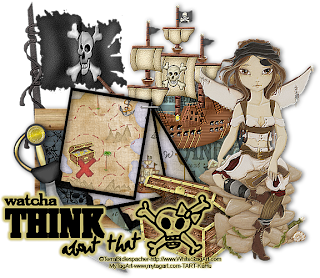
A Pirates Life Tutorial
With this tutorial we will be using a tube, some elements & papers
from a scrap kit, wordart & a template.
Drop shadow used thoughout this tutorial will be:
V-1 H-3 Opacity-65 Blur-15 Colour BLACK
You will need:
Tube - I used a tube from Terra Bidlespacher
You need to be a registered member of MyTagArt
HERE
to purchase her tubes, but any cute tube will do.
Scrap kit called "A Pirates Life" from Monti's Pixel Playground
HERE
Click on her Scrap Kits link on left side board, then click on the
little teddy bear if you agree with her TOU. Scroll down about half way
to find the links to the Papers & Pirate's Life Extra's.
Template 8 from SophisticatedSimonePSPTutorials
HERE
It is the first one on that page.
WordArt from ScrappyBitOfFun
HERE
It is the second lot of downloads down.
Font I used is called "Captain Kidd"
HERE
Plugin Filter - EyeCandy 4000 - GradientGlow
Open up Template 8 - click Shift D to copy it. Close off the original template.
Make the bottom layer (white) active, go to Image-Canvas Size 800x800.
This will give us plenty of room to work our new image.
Delete the very top layer.
Make Paper-Pattern-3 layer active - Select All-Float-Defloat. Copy & paste a paper
from the scrap kit as a new layer. I resize the paper 75% Bicubic-all layers unchecked,
but that is your choice. Selections-Invert, hit delete. Selections-None
You can now delete the original layer.
Now on your new paper layer we will resize that just a little. Go to Image-Resize-
115% Bicubic-all layers unchecked. Adjust-Sharpen. Give drop shadow.
Make Paper-Pattern-2 layer active, Select All-Float-Defloat. Copy & paste another paper
from scrap kit as a new layer - Selections-Invert, hit delete. Selections-None.
Resize this new paper layer 110% Bicubic-all layers unchecked. Give drop shadow.
Delete Paper-Patter-1 layer.
Make Circle layer active - Select All-Float-Defloat - copy & paste a 3rd paper from scrap kit
as a new layer - Selections-Invert, hit delete. Give drop shadow.
Delete Ribbon- & Ribbon-1 layers.
At this stage we will add some of the extra elements from the scrap kit. I chose the Pirate
Flag, resized it 65% Bicubic-all layers unchecked - moved across to the left side of the template
& moved it down to above the white background layer. I then used the Pirate Ship element & pasted
it above the paper circle layer. I gave the Pirate Ship the drop shadow. You can add any of the elements
you like.
Now we will continue with the Template.
Make Phot-3 layer active. Select All-Float-Defloat - copy & paste the smaller Pirate Map from the
scrap kit papers as a new layer - Move the map over the selection - Seletions-Invert, hit delete.
Make Frame-3 layer active - Select All-Float-Defloat, Flood Fill with a dark colour from your tube.
Keep it selected - go to Effects-3D Effects-Inner Bevel with these settings

Selections-None, give drop shadow.
Do the same with the next Phot & Frames layers using the small map for the Photo layers.
When you have done that, make the top layer active, copy & paste your tube as a new layer. Move to where
it will look good. Add drop shadow.
At this stage you can add some more elements from the scrap kit extra's.
Open up the WordArt - Select which one you want, copy & paste as a new layer. Move the WordArt to where
you want it it. Select All-Float-Defloat, colourize it the colour you like. Selections-None.
Effects-Plugins-Eyecandy4000-Gradient Glow with these settings & colour of your choice.

Add your name & correct copyright.
When you have done all that, cross out the eyes on bottom layer (white) MERGE VISIBLE all other layers.
Click COPY on top bar of your canvas & Paste as a New Image on your work space. Your Image should now
have a transparent background. Resize aroung 80% Bicubic-all layers CHECKED.
Save as a *Png image.
This tutorial was written by ©Kate on 10th February 2011.
Any resemblance to any other tutorial is purely coincidental.
You may Link to this tutorial, and/or print for your personal use only.
Please do not copy, rewrite, translate, place it (or Zip files)
anywhere on the web, send via email, or claim it as your own.


Comments
Post a Comment